Are you a visual person? Do you wish you could easily save all your inspiration photos and links in one place? Check out Pinterest! You can create collections (pinboards) about anything - photography, products, recipes, wedding ideas, you name it. Think of it like an Etsy treasury, only you can select things from anywhere on the internet. Here's a collection I'm working on right now, Christmas craft ideas:
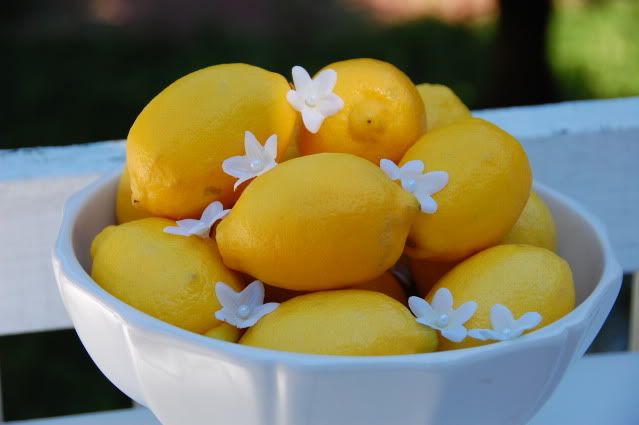
I've known about Pinterest for a long time now, but only joined recently. I don't know why, but when I heard people talk about it, I thought it was something completely different. I'm so mad at myself because this really would've simplified things! I have so many bookmarks (they're categorized but it's still overwhelming to see a giant list of text), plus a pictures folder called "Inspiration" with tons of subfolders (food, party planning, fashion, crafts, etc.). It's a lot easier to browse through the photos, but still not totally convenient when you have to select a category first, then scroll to see everything in the folder. And I've always hated that I can't go back to the website later if I want to, because I never remember where I got the picture. It'd be nice to add some kind of personal note too.
Pinterest eliminates all those problems. When you view your page, you will see an overview of all your pinboards, each made up of tiny thumbnails. When you pin something, it saves the original URL and also links back to the Pinterest member you got it from (if applicable). You can add a description too. Best of all, you can get even more ideas by browsing others' pins. You can view your friends', or search the whole site. My only complaints are that you can't rearrange your pins to be more aesthetically pleasing and that you can't make some boards private.
If this sounds like your kind of thing, join the fun! Follow me and I'll follow you back. Can't wait to see what you come up with.
Showing posts with label diy. Show all posts
Wednesday, November 30, 2011
Monday, October 31, 2011
DIY Halloween Decorations
I lost track of time this year and was going to put up my Halloween decorations this weekend, but then we got hit with a snowstorm. So instead I'll show you pictures of last year's decorations. We had a very low budget, so most things were handmade. The rest came from the supermarket or the Dollar Store. As usual, click on the pictures to view them full size.
We carved our pumpkins with a simple kit from the supermarket. It came with stencils, but you can find a lot of free templates online too. My husband chose a bird with spooky branches, and I picked a witch stencil. Now that we've had some practice, we hope to get fancier next year and try shading. We used glowsticks or battery-operated tealights for light - much safer than real candles.
We put cobwebs all over the deck out front (see first picture), and I made a ghost out of a garbage bag to hang from a tree. I put a tombstone underneath him, made out of an old cereal box and acrylic paints (I made a triangle out of leftover cardboard and glued it to the back to hold the tombstone up, and put rocks on it to weigh it down). I also turned the front windows into eyes, to make it look like the house was watching you.
Inside, I drew a sign for the door, and put up some construction paper bats. I used the leftover paper to make festive magnets. I also made candle holders out of vellum and drew or traced designs with a sharpie (you can also make candle holders by cutting shapes out of brown lunch bags, or by drawing shapes on white ones). Then I put fake branches in vases and strung up pumpkin lights.
I hope this post is helpful to anyone who thinks they can't afford to decorate. A lot of these decorations were done with existing household items; I hardly bought anything new. Most of them can be done with kids, too. If you want more detailed instructions for any of these projects, let me know. You can also find more inspiration and tutorials online.
I know some people go all out with their decorations, turning their home into a haunted house, but I'm proud of what I accomplished with limited resources. This was our first time handing out candy and decorating (previously lived in an apartment building), so we can always step it up next year...provided it doesn't snow again.
What are all of you doing for Halloween? Any creative decorations, treats, or costumes?
We carved our pumpkins with a simple kit from the supermarket. It came with stencils, but you can find a lot of free templates online too. My husband chose a bird with spooky branches, and I picked a witch stencil. Now that we've had some practice, we hope to get fancier next year and try shading. We used glowsticks or battery-operated tealights for light - much safer than real candles.
We put cobwebs all over the deck out front (see first picture), and I made a ghost out of a garbage bag to hang from a tree. I put a tombstone underneath him, made out of an old cereal box and acrylic paints (I made a triangle out of leftover cardboard and glued it to the back to hold the tombstone up, and put rocks on it to weigh it down). I also turned the front windows into eyes, to make it look like the house was watching you.
![]() |
Ghost made from a trash bag, cotton stuffing, and a rubber band. Face (not visible here) drawn with sharpie. |
![]() |
Cereal box tombstone |
![]() |
Eyes made from posterboard. Measured, sketched, then cut out. |
Inside, I drew a sign for the door, and put up some construction paper bats. I used the leftover paper to make festive magnets. I also made candle holders out of vellum and drew or traced designs with a sharpie (you can also make candle holders by cutting shapes out of brown lunch bags, or by drawing shapes on white ones). Then I put fake branches in vases and strung up pumpkin lights.
![]() |
Some drawn, some traced, using clipart for inspiration and markers. |
![]() |
Easy to make! Fold paper in half, draw outline, cut |
![]() |
Paper magnets. If I'd had more time, I would've used Shrinky Dinks |
![]() |
Display by the front door |
![]() |
Vellum witch candle holder |
![]() |
Everything lit up at night |
![]() |
Another vellum candle holder |
![]() |
Luna says Happy Halloween! :) |
I know some people go all out with their decorations, turning their home into a haunted house, but I'm proud of what I accomplished with limited resources. This was our first time handing out candy and decorating (previously lived in an apartment building), so we can always step it up next year...provided it doesn't snow again.
What are all of you doing for Halloween? Any creative decorations, treats, or costumes?
Labels:
decor,
diy,
holiday,
inexpensive,
kid friendly
Sunday, September 11, 2011
My 25th Birthday
I'm back! And slowly trying to catch up on everything I want to accomplish with this blog and my Etsy shop.
As I said in my last post, I've been busy with other hobbies and projects. One of them was planning my 25th birthday party. I've always wanted to have a really put-together, Martha-Stewart-like party (who am I kidding? I wish all my parties were like that!). I love coming up with themes and color schemes, choosing coordinated foods and decorations, and thinking of every detail. Maybe I'll consider a career as a party planner in the future.
I figured 25 is enough of a milestone to justify a big bash, though I didn't want to get too ambitious, since it was my first time hosting such an event. I wanted to keep it casual and comfortable, too. If it were a more formal event, I would've sent invitations, as I had so much fun making the invitations for our wedding (I also made our wedding favors). Eventually I'd like to get into floral arranging so I can make centerpieces too.
I'm happy to report that my first event was a success! The decorations came out perfect - exactly as I imagined them, the food was delicious, and everyone had fun. What more could you want out of a party?
Here are some pictures:
(To view the full size pic, right click and select "view image")
Hope all of you had memorable summers too!
As I said in my last post, I've been busy with other hobbies and projects. One of them was planning my 25th birthday party. I've always wanted to have a really put-together, Martha-Stewart-like party (who am I kidding? I wish all my parties were like that!). I love coming up with themes and color schemes, choosing coordinated foods and decorations, and thinking of every detail. Maybe I'll consider a career as a party planner in the future.
I figured 25 is enough of a milestone to justify a big bash, though I didn't want to get too ambitious, since it was my first time hosting such an event. I wanted to keep it casual and comfortable, too. If it were a more formal event, I would've sent invitations, as I had so much fun making the invitations for our wedding (I also made our wedding favors). Eventually I'd like to get into floral arranging so I can make centerpieces too.
I'm happy to report that my first event was a success! The decorations came out perfect - exactly as I imagined them, the food was delicious, and everyone had fun. What more could you want out of a party?
Here are some pictures:
(To view the full size pic, right click and select "view image")
![]() DIY sign, very easy to make! Tell me if you want instructions. | ![]() L to R: napkins, silverware, plates, veggies & dip, chips & dip |
![]() L to R: chips & dip, potato salad, empanadas, coleslaw, & burger toppings | ![]() Here's a hint about the theme. :) I pretty much love anything lemon. |
![]() Lemon cupcakes with lemon cream cheese frosting, topped with lemon candies | ![]() L to R: coleslaw, burger toppings, lemon ricotta cookies, lemon cupcakes |
![]() Drinks table and bar. The wine glasses have different patterns. | ![]() Homemade lemonade |
![]() Other drinks | ![]() Festive wine glasses |
![]() Another view of the bar | ![]() Polka dot napkins |
![]() Blowing out the candles | ![]() Lemon wedge jello shots |
![]() I love my friends! Even the gift wrapping matched the party. :) | ![]() My niece enjoyed all the tissue paper. Isn't she cute? |
![]() |
And finally, the birthday girl - me! |
Hope all of you had memorable summers too!
Subscribe to:
Posts (Atom)