Monday, October 31, 2011

DIY Halloween Decorations

I lost track of time this year and was going to put up my Halloween decorations this weekend, but then we got hit with a snowstorm. So instead I'll show you pictures of last year's decorations. We had a very low budget, so most things were handmade. The rest came from the supermarket or the Dollar Store. As usual, click on the pictures to view them full size.

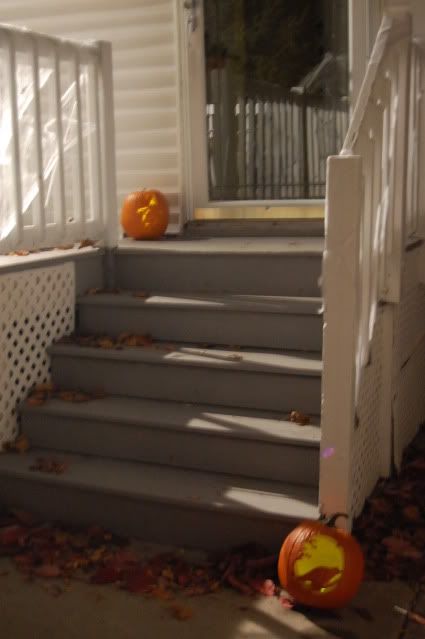
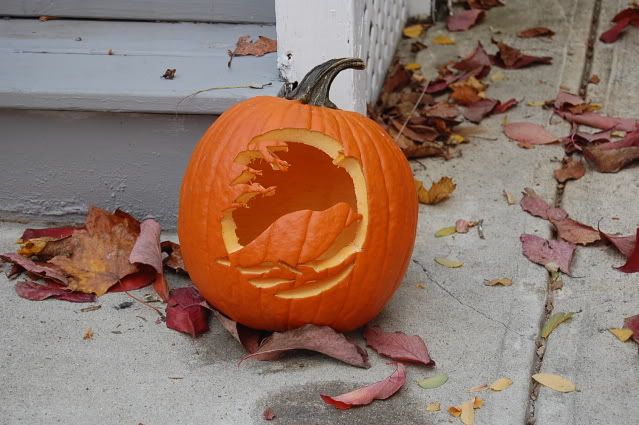
We carved our pumpkins with a simple kit from the supermarket. It came with stencils, but you can find a lot of free templates online too. My husband chose a bird with spooky branches, and I picked a witch stencil. Now that we've had some practice, we hope to get fancier next year and try shading. We used glowsticks or battery-operated tealights for light - much safer than real candles.


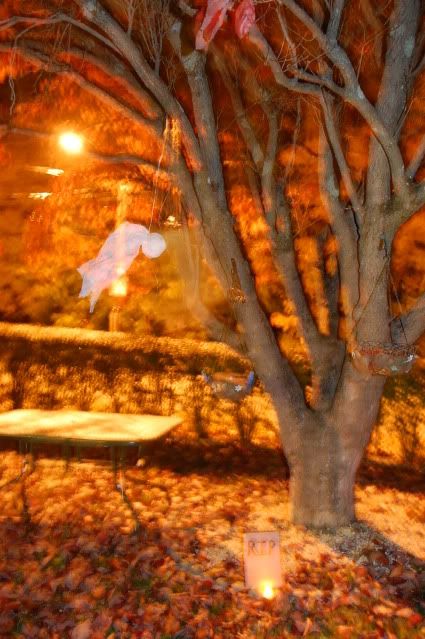
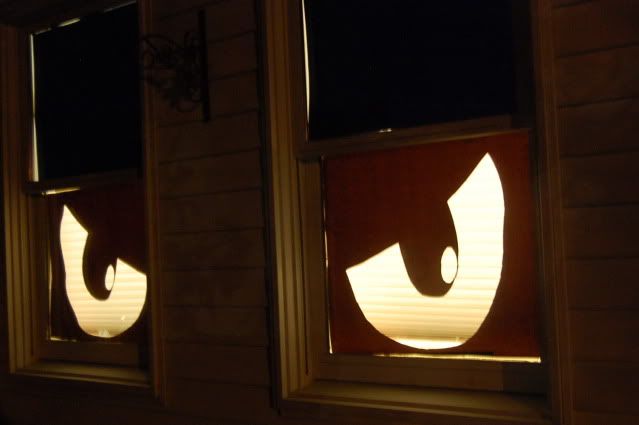
We put cobwebs all over the deck out front (see first picture), and I made a ghost out of a garbage bag to hang from a tree. I put a tombstone underneath him, made out of an old cereal box and acrylic paints (I made a triangle out of leftover cardboard and glued it to the back to hold the tombstone up, and put rocks on it to weigh it down). I also turned the front windows into eyes, to make it look like the house was watching you.

Ghost made from a trash bag, cotton stuffing, and a rubber band. Face (not visible here) drawn with sharpie.
Cereal box tombstone
Eyes made from posterboard. Measured, sketched, then cut out.

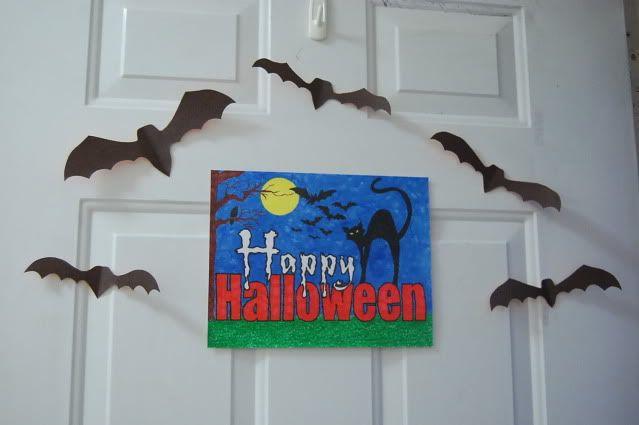
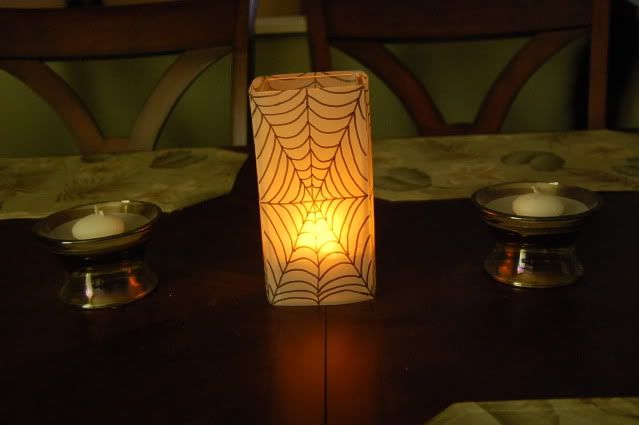
Inside, I drew a sign for the door, and put up some construction paper bats. I used the leftover paper to make festive magnets. I also made candle holders out of vellum and drew or traced designs with a sharpie (you can also make candle holders by cutting shapes out of brown lunch bags, or by drawing shapes on white ones). Then I put fake branches in vases and strung up pumpkin lights.

Some drawn, some traced, using clipart for inspiration and markers.
Easy to make! Fold paper in half, draw outline, cut
Paper magnets. If I'd had more time, I would've used Shrinky Dinks
Display by the front door
Vellum witch candle holder
Everything lit up at night
Another vellum candle holder
Luna says Happy Halloween! :)
I hope this post is helpful to anyone who thinks they can't afford to decorate. A lot of these decorations were done with existing household items; I hardly bought anything new. Most of them can be done with kids, too. If you want more detailed instructions for any of these projects, let me know. You can also find more inspiration and tutorials online.

I know some people go all out with their decorations, turning their home into a haunted house, but I'm proud of what I accomplished with limited resources. This was our first time handing out candy and decorating (previously lived in an apartment building), so we can always step it up next year...provided it doesn't snow again.

What are all of you doing for Halloween? Any creative decorations, treats, or costumes?

Sunday, September 11, 2011

My 25th Birthday

I'm back! And slowly trying to catch up on everything I want to accomplish with this blog and my Etsy shop.

As I said in my last post, I've been busy with other hobbies and projects. One of them was planning my 25th birthday party. I've always wanted to have a really put-together, Martha-Stewart-like party (who am I kidding? I wish all my parties were like that!). I love coming up with themes and color schemes, choosing coordinated foods and decorations, and thinking of every detail. Maybe I'll consider a career as a party planner in the future.

I figured 25 is enough of a milestone to justify a big bash, though I didn't want to get too ambitious, since it was my first time hosting such an event. I wanted to keep it casual and comfortable, too. If it were a more formal event, I would've sent invitations, as I had so much fun making the invitations for our wedding (I also made our wedding favors). Eventually I'd like to get into floral arranging so I can make centerpieces too.

I'm happy to report that my first event was a success! The decorations came out perfect - exactly as I imagined them, the food was delicious, and everyone had fun. What more could you want out of a party?

Here are some pictures:

(To view the full size pic, right click and select "view image")

DIY sign, very easy to make! Tell me if you want instructions.
L to R: napkins, silverware, plates, veggies & dip, chips & dip
 
L to R: chips & dip, potato salad, empanadas, coleslaw, & burger toppings
 
Here's a hint about the theme. :)
I pretty much love anything lemon.
 
Lemon cupcakes with lemon cream cheese frosting, topped with lemon candies
 
L to R: coleslaw, burger toppings, lemon ricotta cookies, lemon cupcakes
 
Drinks table and bar. The wine glasses have different patterns.
 
 Homemade lemonade
 
Other drinks
 
Festive wine glasses
 
Another view of the bar
 
Polka dot napkins
 
Blowing out the candles
 
Lemon wedge jello shots
 
I love my friends! Even the gift wrapping matched the party. :)
 
My niece enjoyed all the tissue paper. Isn't she cute?

And finally, the birthday girl - me!

Hope all of you had memorable summers too!

Wednesday, June 1, 2011

I'm still here!

Just a quick post to say that I haven't abandoned my blog (or my Etsy shop). I will have real updates again soon. I've just been focusing on other things, like bird watching, enjoying the weather/outdoors (or huddling in front of the AC when it's 90 degrees), and spending time with my family. My mom has been in and out of the hospital lately, and my uncle visited from Louisiana. My husband and I also celebrated our 2nd wedding anniversary (and 7 years together total).

One of the complaints I hear most often from new Etsy sellers is that they are overwhelmed trying to run and promote their shop. Not only do you have to design products, create them, photograph them, measure & weigh them, and type up descriptions...then there's all the work you have to do to get your shop noticed if you want any hope of making a sale one day. There's SEO keywords, Etsy teams, treasuries, Facebook, Twitter, blogs, etc. You have to be active in so many different communities and websites. I know sometimes I feel like I spend more time promoting my shop than I do making jewelry. Promoting an Etsy shop could easily be a full time job all on its own. I admire anyone who works outside the home and still finds the time and energy to run a successful Etsy shop (especially if they have kids too).

Is all the work worth it? The short answer is yes. This is my second time around selling on Etsy and I had more views and sales within a few weeks than I had in months last time because I knew nothing about networking then. But you need to have a life outside of Etsy too. I'm sure all of us started making stuff because it was fun, and it should still be fun now. If it's causing you too much stress, then it's time to take a step back. Either do what you've been doing less often, or take a break completely. I justify it to myself by realizing that even when I go crazy promoting my shop, I'm not guaranteed a sale, so I'm not necessarily losing out on anything if I don't do that stuff for a while.

When I do start again, it always helps me to have a list. It's best if you focus on one thing at a time, and set some limits for yourself. I'll talk about that in more detail another time, though, so I can share more specific tips. I admit that I still haven't found a good balance for everything -- I feel like I'm either doing all Etsy stuff or nothing at all (hence my absence here) -- but I'm working on it. If I figure out the secret, I'll let you know!

Monday, May 16, 2011

Jewelry Giveaway!

I didn't meant to post so close together, but I forgot to mention this earlier. I was interviewed on someone's blog! And there's a giveaway open to anyone who comments there (see the post for more details). Which of my products could you win? These strawberry & chocolate cake earrings!

Photobucket


Grace's blog has a garden theme, and she was interviewing Etsy sellers as part of her May Garden Party. I chose these earrings for the giveaway because they make me think of a garden tea party. I can picture cute and elegant desserts like this being served.

Here's the link to the interview and giveaway details: Garden Giveaway #7 Sponsored by Made by Michelle.

You have until the end of the month to enter, so go comment! :)

Sunday, May 15, 2011

Etsy Showcase Tips and Review

For those of you who don't know, Etsy Showcase if a form of advertising on Etsy. You purchase a 24-hour slot, choose which of your listings to promote, and your products will appear as "Sponsored" in certain locations on the Etsy website. For example, with a Jewelry Showcase, your products will appear at the top of the Jewelry page (for people shopping by category). Showcases are available for every main category and also for subcategories such as Earrings, Necklaces, etc.

When I opened my shop, I was very curious about how this works, so I did a lot of research. Almost every review I read said that it isn't worth it, that you might get more views and hearts, but no sales. I told myself I was going to try it anyway -- why not when it's only $7 a day? -- and decided to post about my experience in case it helps anyone.

Well, before I could test a showcase spot, I had to figure out how the heck you buy one! Etsy says they go on sale every day at midnight (ET), but whenever I checked, it always said 0 spots left. I wondered what I was doing wrong. I looked into it, and all the advice I found just said, "Be there right on time." How annoying and unhelpful when I was already doing that!

What they should have said is, "Be there at 11:45 and obsessively refresh the page." Yep, I sat there for 15 minutes, with one hand on the mouse and the other hitting ctrl + R every few seconds. I got lucky and refreshed the page the very second my computer clock hit 12:00 and finally I saw open spots! I clicked, saw the confirmation page, and immediately went back in case I wanted to purchase more in other categories. None left! The clock hadn't even hit 12:01. So if you think you're doing something wrong, nope. These spots just sell out in seconds.

If you're lucky enough to land a spot, you can then use the Promote page to organize your listings. Your showcase will only show one item at a time. It starts at the top of your list and items get replaced with the next in line if they sell. I'd already had a decent amount of shop activity (views and hearts - no sales) after being active in forums, so I ordered my products by most hearts. I think this was the key to my success, so if you're considering a showcase, wait until you have hearts on at least 5 different products. You may be surprised at what is most popular (some things I thought would do really well only have a few hearts).

EDIT: I think it also helped that I chose the main Jewelry showcase. (I figured if someone is shopping by category rather than searching, they're not looking for something specific, so they're more likely to browse a general category than a specific one.) I've since learned that many of the negative reviews I saw referred to subcategory showcases, so keep that in mind too.

I am happy to say that my experience was opposite everyone else's. I made my first sale the day of my showcase, along with two more! I sold my most popular item (I think it had about 250+ views and 20 hearts), my 2nd most popular, and a recreation of the 2nd one. Unfortunately I didn't get any extra hearts after that (and I don't keep track of views), but by then it was later in the day. I'm sure my other products just needed more time in the spotlight.

There are some cons to Etsy Showcase -- not everyone shops by category (I prefer to search), and your listing isn't always on the first category page (there are only 4 images spots but more showcased shops, so it rotates through them) -- but overall, I say it's worth a try. I made back my $7 easily, and plan to do more showcases in the future. I believe the key to making a sale is reaching as many people as possible until you find the one who's willing to buy, and Etsy Showcase helped me do that.

(Sorry for the text only post; wish I had some pics to include. Posts coming soon: more Etsy tips, including a photo tutorial for people with point-and-shoot cameras.)